标签:Linux

Install Jupyter notebook on Ubuntu 24.04 and allow remote access.
**References:** **Vultr** How to Install Jupyter Notebook on Ubuntu 24.04 https://docs.vultr.com/how-to-install-jupyter-notebook-on-ubuntu-24
 2025-08-12
Ubuntu Server 笔记
这篇笔记记录了日常使用ubuntu时需要设置的笔记 ### systemd-networkd-wait-online.service `systemd-networkd-wait-online.service` 是 Systemd 的一个服务单元,主要用于在系统启动时等待网络连接就绪。以下
2025-07-24

Pangolin 安装和使用示范
## Pangolin 安装和使用示范 ## 前提条件 为了跟随视频中的操作和配置教学,以下条件是可选的。 视频内容: https://www.bilibili.com/video/BV1cAJHz8EAj/ - 一台有独立公网IP地址的云服务器 - 一个域名 -
2025-05-30
在 Ubuntu 24.04 LTS 中的安装ERPNext 笔记 Step by Step
ERPNext 在 Ubuntu 24.04 LTS 中的安装笔记 Step by Step文章目录 | Table of ContentsERPnext 简介先决条件安装步骤总结 & 引用先决条件 | Prerequisites系统环境要求Ubuntu 24.04A user with sudo
2025-03-05
Linux 常用命令笔记
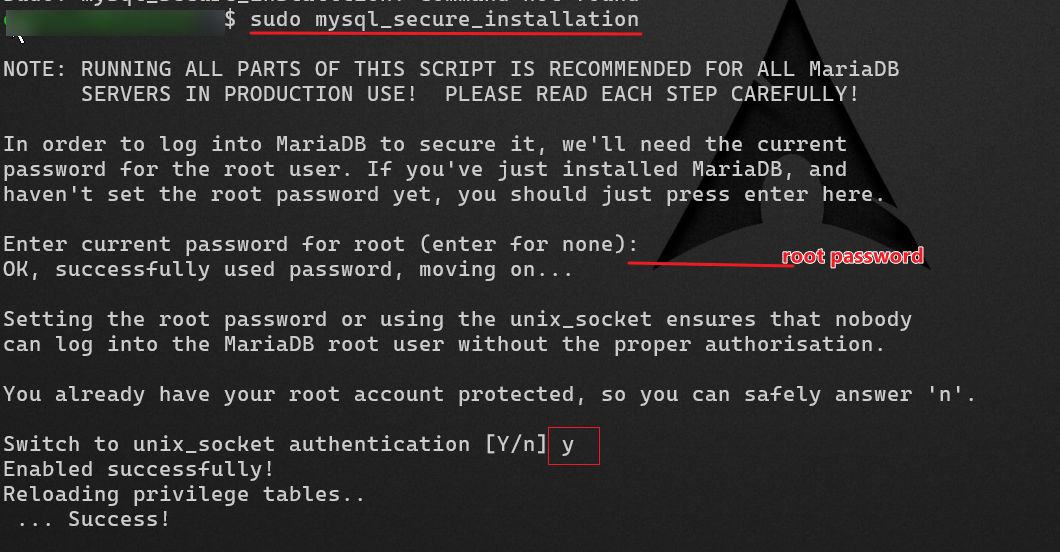
Linux 真好用与Windows 相比, Linux 的效率实在太好了。为了避免自己忘记用过的命令,避免手忙脚乱又到处去找,特意写一下笔记。最近在忙别的~ 11月好快,就要过完了,所以及时来水一篇。Vim 配置以下命令可以对齐VIM编辑器,会高亮输入光标sudo echo set nu ts=2
2024-11-22
Setting Up SMB Service on Ubuntu 18.04
Setting Up SMB Service on Ubuntu 18.04Table of ContentsInstall SMB and enable the SMB server and restart it.Add an SMB user.Edit the SMB configuratio
2024-07-25
Flash OpenIPC firmware onto SigmaStar SSC335 SoC and Sony IMX307 IPC module.
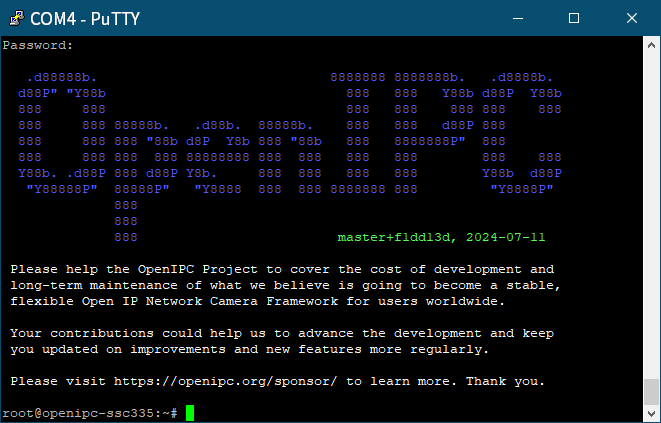
Flash OpenIPC firmware onto SigmaStar SSC335 SoC and Sony IMX307 IPC module.RequirementsIPC moduleUSB to TTL cableWindows laptop or computerRunning a
2024-07-18
Share an Old Printer on Your Local Network – CUPS
In this article, I will share with you about my second time installing CUPS on Ubuntu.RequriementUbuntu 18.04 LTS Install on an Old ComputerCanon E410
2024-06-16
Nssm在Windows操作系统中安装系统服务
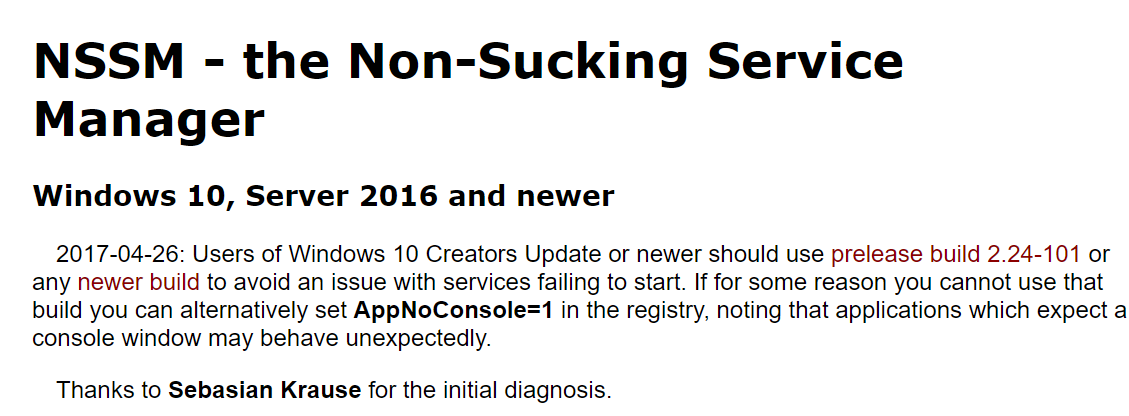
因为Frp client 之前是使用批处理启动的,所以每次电脑重启之后,需要等到登录之后才能启动。目的是要操作系统启动之后就直接启动Frp client。为了解决这个问题,所以使用nssm来将Frp client安装到windows的服务,使它作为服务启动。这样就可以实现当电脑启动之后就可以直接启动
2024-06-02
SoftEther VPN Server Ubuntu 安装笔记
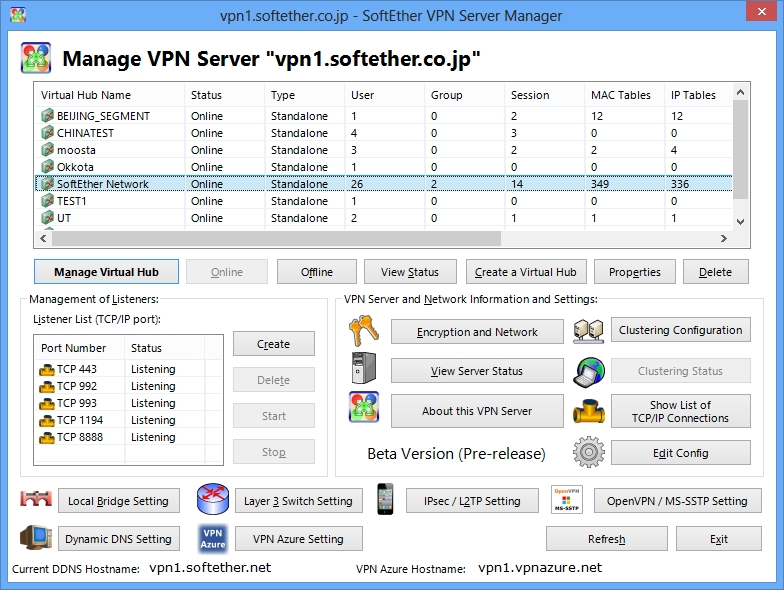
SoftEther 是一个由日本筑波大学开发的开源VPN 项目,你可以自由的使用它为你的家庭或者公司组建虚拟局域网。它拥有多平台服务端和客户端,方便简易的操作界面,得到了很多人的喜爱。接下来就跟着我的操作一起来学习一下吧。SoftEther 简介https://www.softether.org/9
2021-05-10