作者:小四

Pangolin 安装和使用示范
## Pangolin 安装和使用示范 ## 前提条件 为了跟随视频中的操作和配置教学,以下条件是可选的。 视频内容: https://www.bilibili.com/video/BV1cAJHz8EAj/ - 一台有独立公网IP地址的云服务器 - 一个域名 -
 2025-05-30

Typecho 迁移到 WordPress 笔记
## 准备工作 1. Typecho 数据导出插件 `Byetyp` https://github.com/sunxiyuan/ByeTyp 2. 打包备份Typecho中`/usr/uploads` 的数据 3. 备份统计代码和ADsense 代码 ## 步骤
2025-04-17
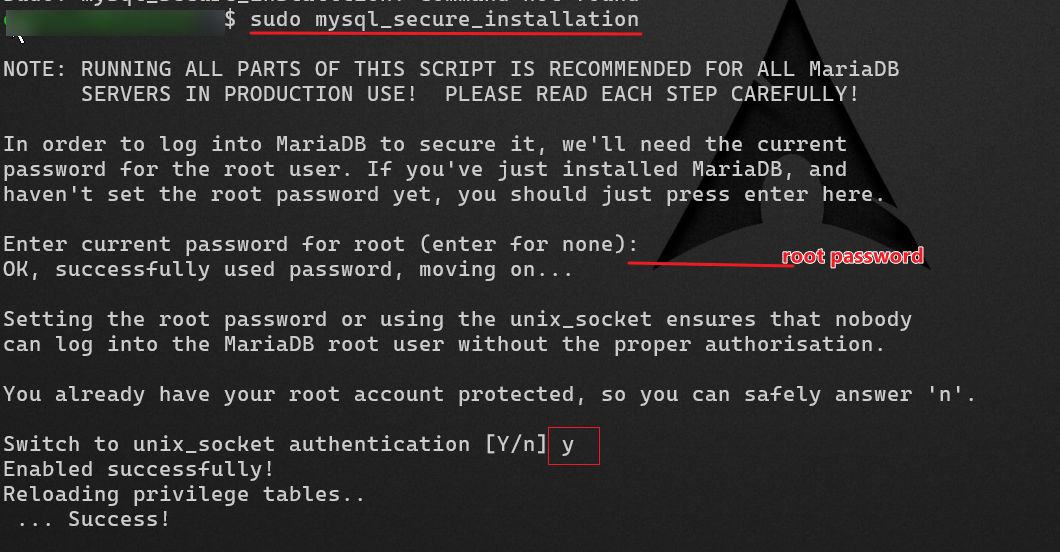
Wireguard安装笔记
04/04/2025 15:01文章目录先决条件WireGuard 安装(Wg-easy)docker 常用命令VPS安装Wireguard的先决条件带公网IP地址的设备 / IPV6 也可以 (该笔记使用的Ubuntu18.04 操作系统的VPS 作为例子)VPS 启用SSHVPS安装Docke
2025-04-11
在 Ubuntu 24.04 LTS 中的安装ERPNext 笔记 Step by Step
ERPNext 在 Ubuntu 24.04 LTS 中的安装笔记 Step by Step文章目录 | Table of ContentsERPnext 简介先决条件安装步骤总结 & 引用先决条件 | Prerequisites系统环境要求Ubuntu 24.04A user with sudo
2025-03-05
Proxmox 内存图表等性能监控无数据显示的解决办法
故障现象Proxmox 性能显示界面无数据,且时间为1970-01-01解决方法同步系统时间和硬件时间: 先确保系统时间和硬件时间是正确且同步的:# 设置正确的系统时间(例如:2025-01-13 10:00:00) date -s "2025-01-13 10:00:00"
2025-02-02
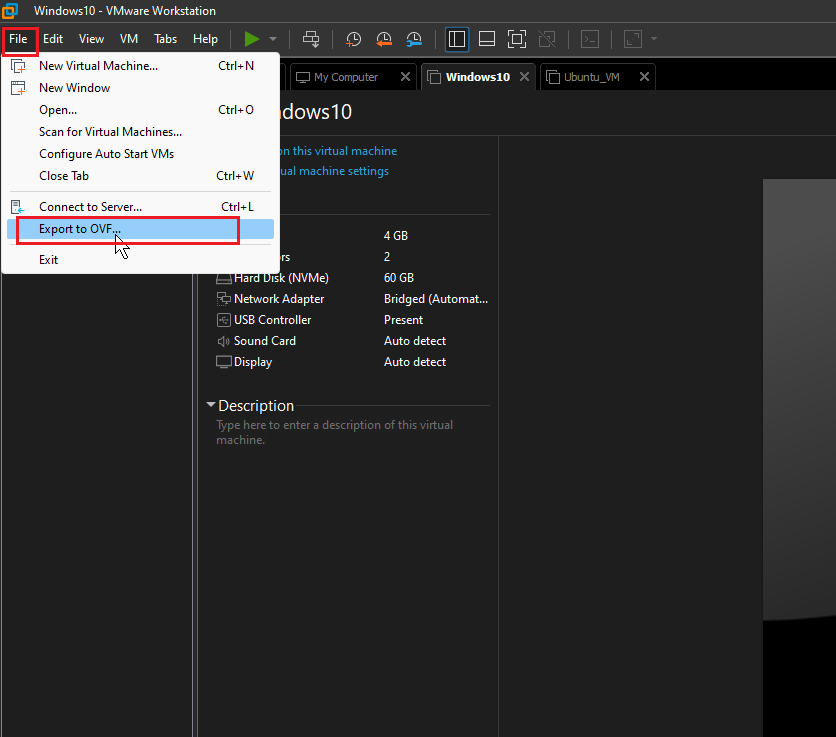
VMware Station 遷移到 Proxmox PVE 筆記
VMware Station 遷移到 Proxmox PVE 筆記必要條件VMware Station 中有VMSVMware Station宿主機和Proxmox 服務器有足夠的磁盤空間一些基本的Linux命令知識當前的軟件版本VMware Station: VMware® Workstation
2025-01-13
WordPress ERR_TOO_MANY_REDIRECTS 解决办法
故障现象在登录WordPress 后台时 浏览器显示 “ERR_TOO_MANY_REDIRECTS” 导致无法正常登录后台解决思路和步骤检查Cloud Flare HTTPS 配置 - - OK检查WEB 服务器中HTTPS 配置 - - OK检查Wordpress 数据库中的 si
2024-12-18
Linux 常用命令笔记
Linux 真好用与Windows 相比, Linux 的效率实在太好了。为了避免自己忘记用过的命令,避免手忙脚乱又到处去找,特意写一下笔记。最近在忙别的~ 11月好快,就要过完了,所以及时来水一篇。Vim 配置以下命令可以对齐VIM编辑器,会高亮输入光标sudo echo set nu ts=2
2024-11-22
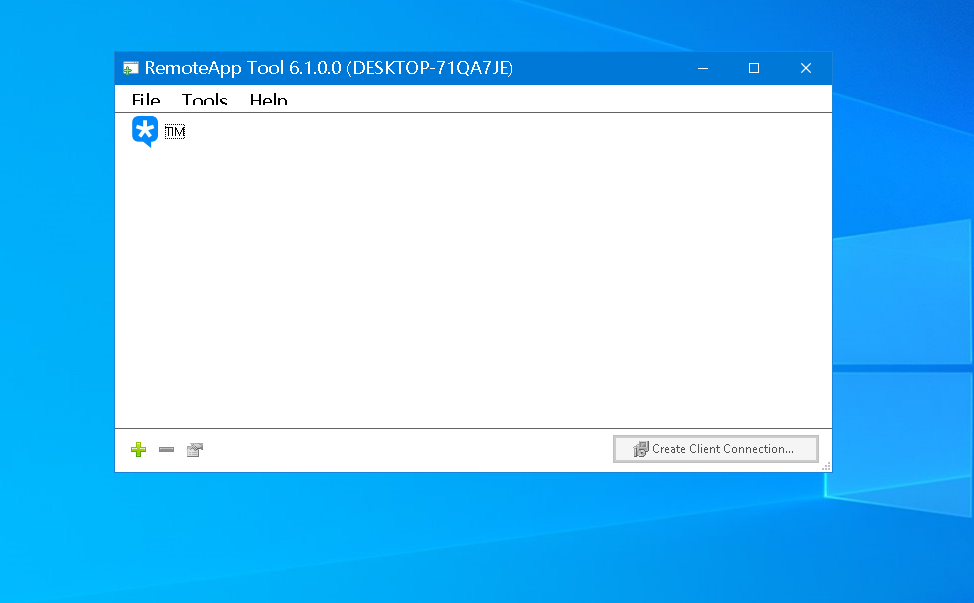
在本地PC使用遠程PC的軟件
在本地PC使用遠程PC的軟件起因是因為在日常工作的時候,有一個需求是要用到遠程計算機中的某一個應用程序。正常的操作是通過RD(remote desktop )來遠程目的PC,再進行操作。這樣對我來說有點麻煩, 我想直接在我本地的PC直接執行遠程PC的應用程序。於是就找到了“RemoteApp Too
2024-10-25
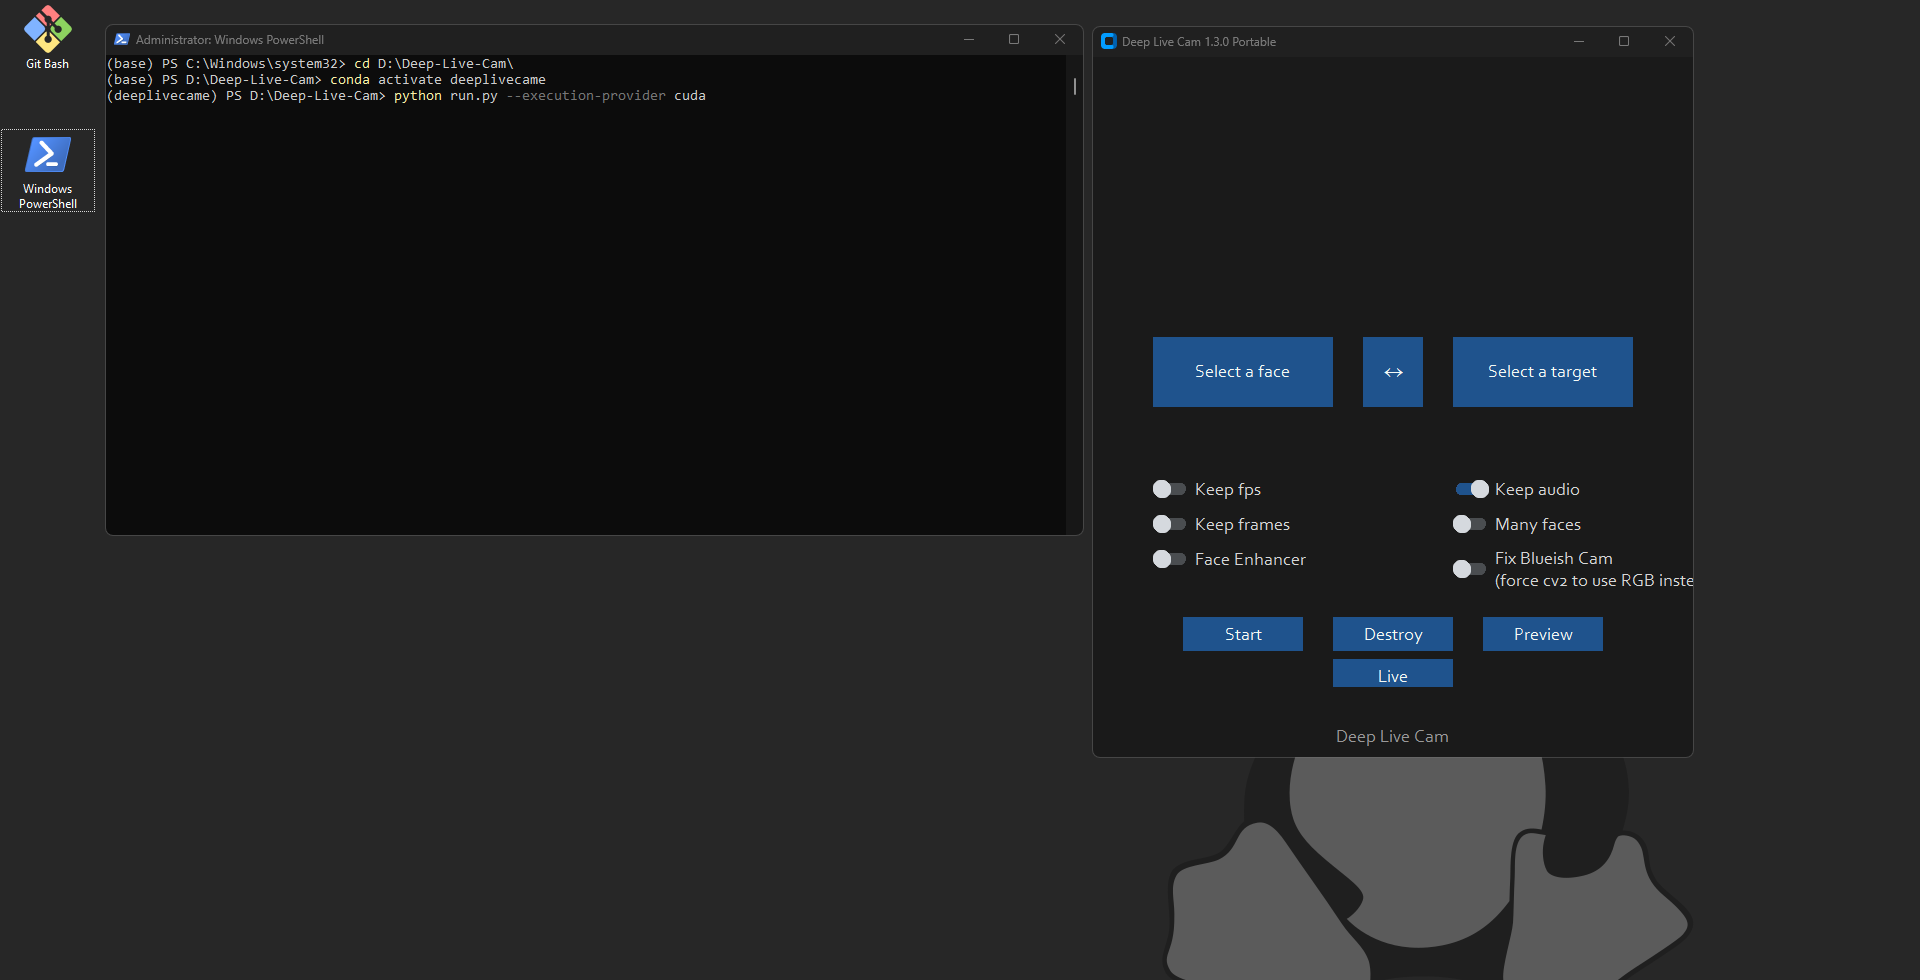
Deep Live cam 笔记
Deep Live cam 笔记项目地址: https://github.com/hacksider/Deep-Live-Cam在本篇笔记中不会涉及cuda,Python,Conda,Git,等相关的计算机知识。只有步骤记录和在使用部署时遇到的问题记录。以下操作都是在Windows操作系统下进行的,
2024-09-06